In Simply CRM, a lead is an unqualified prospect – a potential customer that can be turned into a regular client through extensive marketing and advertising efforts.
When you capture a new lead, you can record its information and manage your sales process through the Leads app in Simply CRM. Leads is an optional module that builds on the infrastructure of the Contacts app and provides a better overview of each lead.
How to activate the Leads app
To capture leads in Simply CRM, you’ll first need to activate the Leads app in the Simply App Store.
If you’re unsure how to activate apps, please check our guide here.
How to create leads in Simply CRM
When you enable the Leads app in your instance of Simply CRM, you can start creating Leads records. You can create leads manually, add them using the Quick Create option, import them from .csv or .vcf files, or capture them from your website or email.
How to create leads manually
If you want your organization to have full control over each individual Leads record, your sales agents can create leads manually.
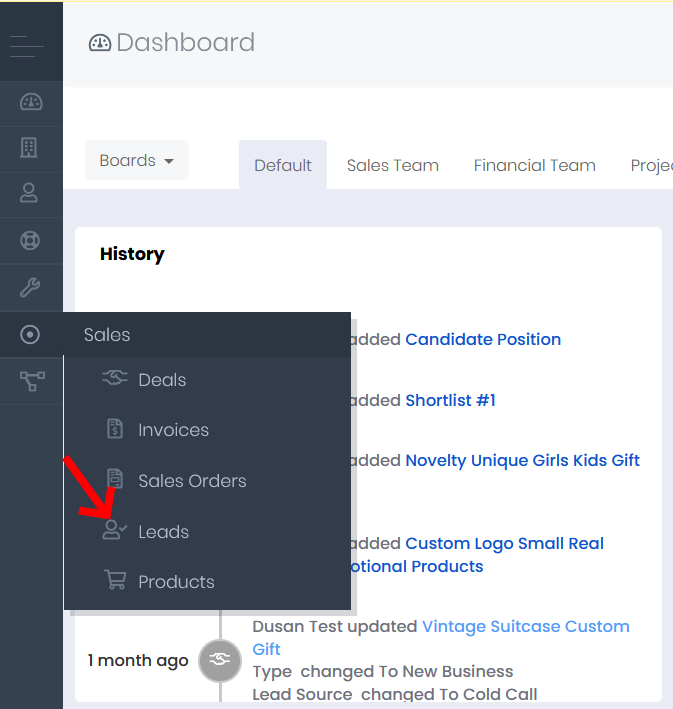
To create a lead manually, open the Leads app by selecting Leads under the Sales tab on the dashboard sidebar.
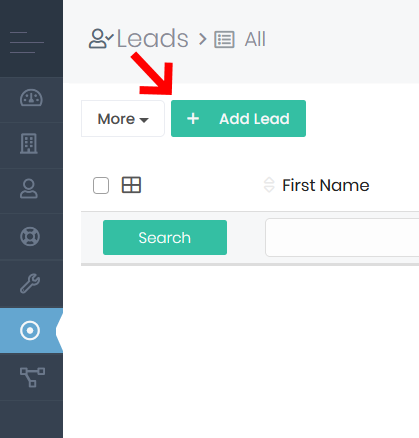
On the Leads page, press the Add Lead button in the top left corner.
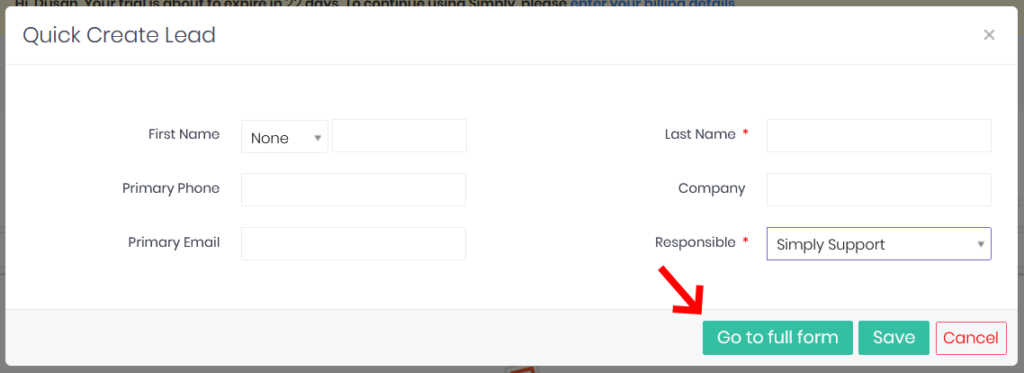
The button will open the Quick Create window for the Leads app. If you wish to create a complete Leads record, press Go to full form. Otherwise, you can create a Leads record with basic details using the Quick Create prompt.
The Go to full form button will lead you to the detailed form shown below.
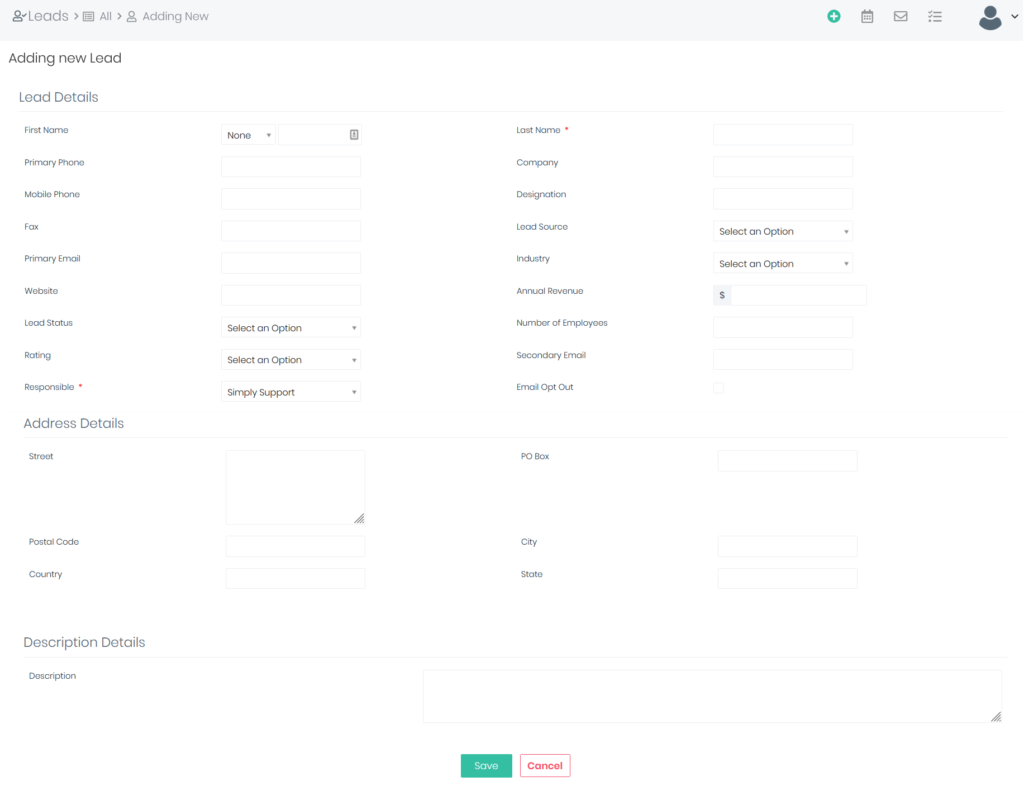
By default, all mandatory fields are denoted with a red asterisk symbol. In the case of Leads records, only two fields are mandatory: Last Name and Responsible, which denotes the person who is responsible for handling the lead.
Aside from these mandatory fields, Simply CRM also provides you with a large number of optional fields to store all the relevant information about your lead, as well as the ability to create custom fields.
How to use Quick Create to create new leads
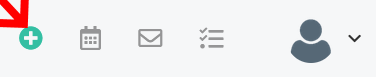
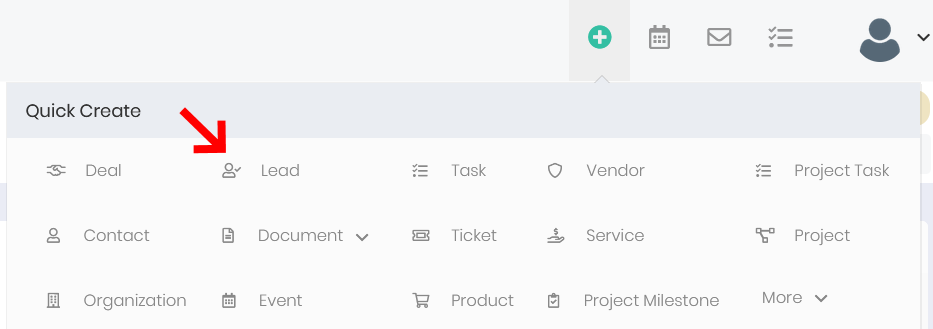
If you only need to store basic details about your lead, you can use the Quick Create option. This option is accessible on every page of your Simply CRM instance and you can access it by pressing the plus icon in the top right corner.
When you press the icon, you’ll open the Quick Create drop-down menu, from where you can select the Lead option.
You’ll receive a pop-up form where you can enter the basic details about your lead.
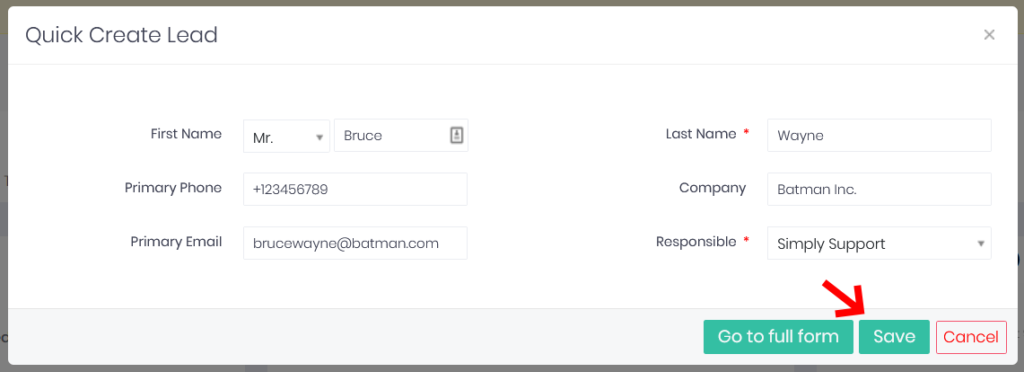
Fill out the record’s details and press Save. Please keep in mind that mandatory fields are denoted with a red asterisk.
How to import leads from external files
If you have a large list of leads stored in a .csv or .vcf file, you can quickly import all leads using the Import option in Simply CRM.
Our detailed guide on importing records contains all the instructions you need to successfully import leads (or any other records) to your system.
In case you’ve never imported records before, we recommend checking our guide on preparing sheets before importing data.
How to capture leads from webforms
Simply CRM allows you to create personalized webforms that will be shown to your website visitors. You can use webforms to capture leads and store important information such as lead name, email, contact address or any other data point that’s necessary for your business.
To learn more about webforms, please check our guide on creating and using webforms in Simply CRM.
How to capture leads from emails
Using our Mail Manager app, you can quickly create new Leads records from incoming emails. If you’d like to convert email contacts into leads, check our guide on how to use Mail Manager.
How to qualify and filter leads
Simply CRM offers an intuitive dashboard that allows you to qualify each lead, track their progress, manage and filter them according to your company’s needs.
You can qualify leads using the Leads Status field that can be found on the full form page when creating new leads. The same field becomes available when you’re editing a specific Leads record.
To edit a lead, simply press the Edit button next to the lead’s name.

This field offers a variety of drop-down options which you can use to better describe your lead. From Junk Lead to Qualified and Hot, whatever the lead’s level of interest is, Simply CRM has a suitable option.
Once you assign the Leads Status to every lead, you can apply filters and create a better overview of the most important leads in your company.
To apply a filter, open the Leads app.
You’ll see the list view of all available Leads records as shown in the image below.
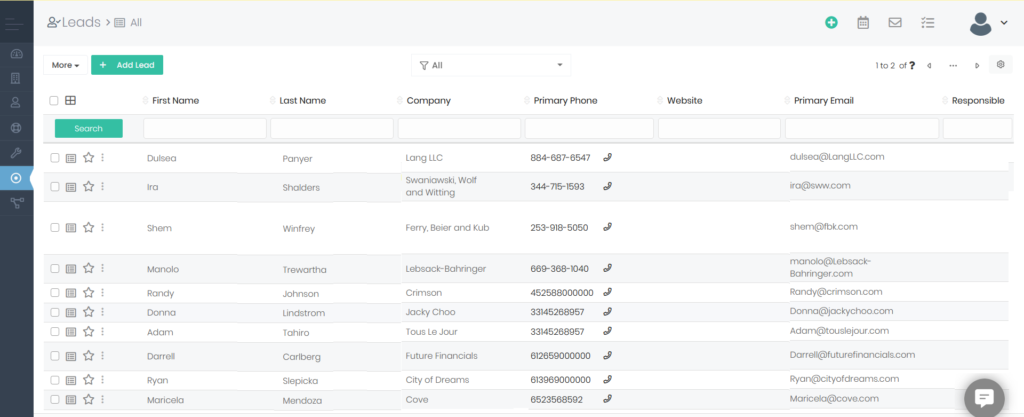
This complete overview might be useful if you want to see all the leads in your system, but your sales team will often need to prioritize certain leads. In such cases, you need to quickly sort through the leads and create a personalized overview. You can achieve that using the Filter option at the top of the list view.
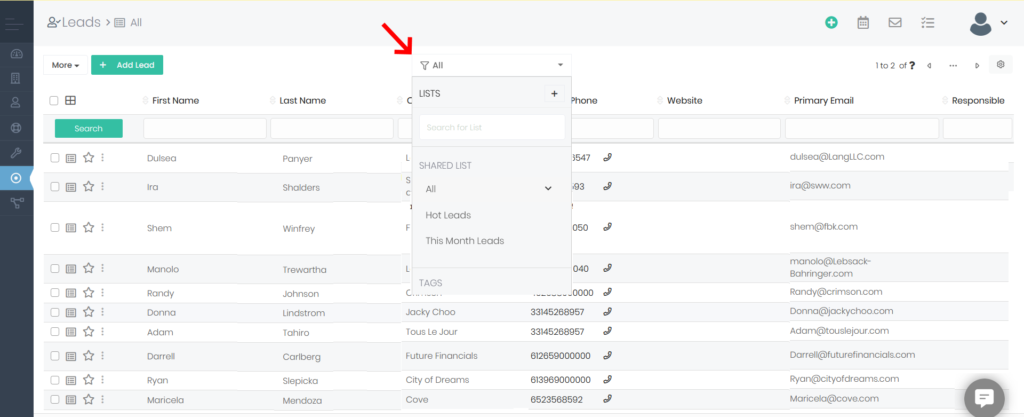
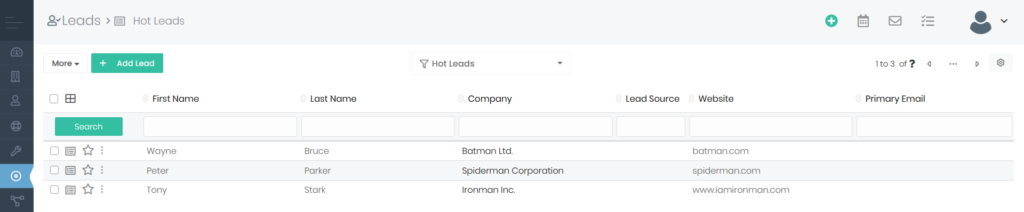
By default, you’ll be able to filter all leads and show only Hot Leads and This Month Leads. Below, we’ll show you what the Hot Leads filter looks like – all records have their Lead Status field set to Hot.
If you need a custom overview, you can press the plus icon next to the Lists option within the Filter drop-down to configure your own sorting criteria.
This way, you’ll open the New List pop-up window where you can enter your own filter details.
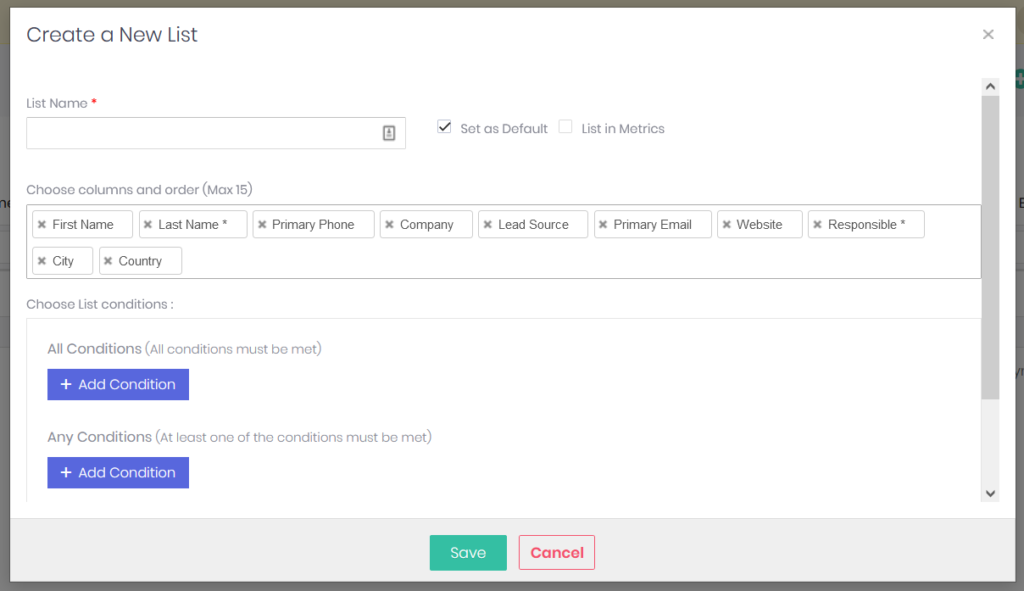
If you’re unsure how to configure the filter using the pop-up form, please check our article on setting up filters in Simply CRM.
How to convert leads into contacts, organizations and deals
Once you qualify a lead and it reaches a certain status, you may want to transform it into a contact, organization or a deal.
To convert a lead, open the Leads app and click on the record that you want to convert to a deal. This way, you’ll open the detailed view of your record.
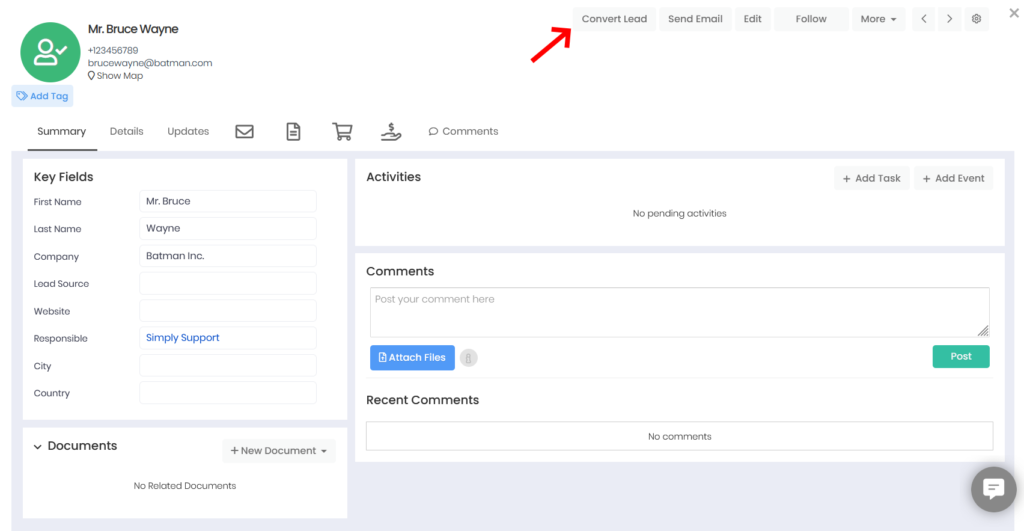
At the top of the page, you’ll see the Convert Lead button.
By clicking the button, you’ll open the pop-up window which will allow you to configure the record conversion settings.
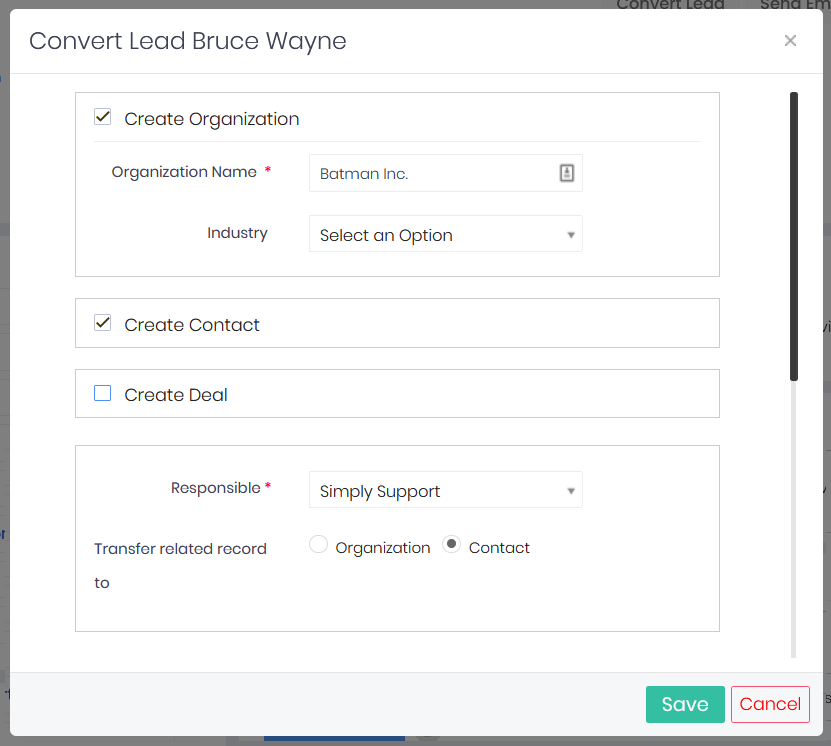
Select which types of records will be created from your lead and enter the basic record details, such as Organization Name, Contact First Name and Last Name, etc.
Then, specify the person that will be responsible for handling the newly converted record and decide whether it will be transferred to the Organizations or Contacts module.
When you finish configuring the conversion settings, press Save.
The record will become available in the module(s) you selected in the conversion pop-up window.
If you need any help with the Leads app, please don’t hesitate to reach out to our support team through LiveChat or email us at support@simply-crm.com.


